Pages

Monday, May 31, 2010

How to make a knit bag

Items you will need:
1 Knit piece of fabric at least 10” wide x 20” Long

2 a pair of 5 or 6 in Diameter Round Bamboo Handles

3 lining fabric, same size as your knit piece

Recommened tools to have on hand:
1 Sewing machine

2 Scissors

3 Straight Pins

4 Thread to match fabric

5 Big eye needle

Item 1, Knit fabric:

You will need to follow the directions on the yarn label and knit a piece of fabric at least 10” wide by 20”Long.
The wider your fabric the more you have to gather onto the circular handles. The longer your fabric the deeper your bag. So you have some design flexability here.

Item 2, Bamboo Handles:

You will need to purchase a pair of 5 or 6 in Diameter Round Bamboo Handles. This size handle matches the size of the knit fabric piece, to make a small bag.

Item 3, lining fabric:

You need to cut a piece of lining fabric the same size as your knit fabric piece.


knit your fabric:

Choose any yarn you would like, it will all work as the bag will be lined for strength. You will need to do the math to figure out what needle size you need, and how many stitches wide by how many rows you will need to knit.
Example: If your label says that with a Needle size 8 you get 17 Stitches and 23 Rows for a 4 x 4 inch square - Divide the 17 Stitches by 4 - to give you the number of Stitches per inch 4.25 then multiply this by the width of your fabric 10 inches - this will give you your cast on 42.5 - you can’t do the .5 so you will either choose to go up or down the .5. in this case I would do 42 to keep it even.
Then Divide 23 by 4 to figure out how many Rows per inch 5.75 and multiply that by the Length of your fabric 20 inches this will give you the total number of rows you need to knit 115.

Prep lining fabric

Cut a piece of fabric the same size as your knit piece
Serge or zigzag all the way around your fabric.


attach lining to knit fabric

Place fabric with right sides together. Fold in side seams seam allowance. Pin and stitch ONE side.

insert bamboo handles

Slide lining into bamboo handles.


Fold in side seams seam allowance.

Stitch seam along 2nd edge.

Turn right side out.


sew handle casing

Turn lining pocket in and put handles in place along the top seam.
Stitch a seam just under the handles. You can stitch this seam by hand or with your sewing machine.


Warning: If you use your sewing machine make sure that your handles are to the outside of your sewing machine, if you put them to the inside - your needle shaft will hit the handles and lock up, because the handles are to thick, you don’t want to know how I know this!


sew lining side seams

Find center of lining.
Fold up to the top, moving bamboo handles and knit fabric out of the way
Stitch from the lining from center to 2 inches from the top. repeat for the 2nd side seam.


sew knit side seams
With the same yarn as your knit fabric piece, seam the knit fabric side seams from center to 2 inches from the top.


I participate in:

Saturday, May 29, 2010

Scripture Bag Pattern

I have been finding it hard to make time to blog. Not that I haven't been doing crafts because I have. It's just that I haven't been able to finish - finish something. I have lots of things almost done. or even the done stuff isn't photographed and the story written up in my mind.

For some reason I can't seem to be able to just open the 'New Post' window and type. I really need to get better at that.

Well here is something that I have finished! A scripture bag pattern. I taught a sewing class on it almost a year ago, and never managed to get back to it. I guess in my mind because the class was taught and done, then I was done.

Until a student asked if I could email her the sewing directions she had forgotten how to put it together. It's only three pattern pieces and once you remember the trick to getting the sides on it comes together in less than an hour.

Wednesday, May 26, 2010

Designing Quilts and Quilt Looks with Stitch Painter

Designing Quilts and Quilt Looks with Stitch Painter
By Tracy Ahrens, Cardiff by the Sea, CA

Many of us have grown up with the quilts that have been handed down through generations and quilting today is one of the most popular fiber-art crafts that exists. From the home consumer to the Smithsonian, quilt designs provides an innovative canvas you can use to convey your art.

There are endless options available now for the computer and choices that can be used for exciting new concepts in quilting. Any texture/print or color combination can now be tested and determined on the screen. In addition, you may experiment with block rotation and manipulation quickly and effectively. The end product does not necessarilly have to be a fabric quilt. Rather, you can incorporate a 'quilt-look' into a stitched piece of canvas or a knit garment. The idea is that quilt blocks serve as your inspiration.

Using Stitch Painter you can create your own quilt blocks, or as we did in the following tutorial, you may use pre-drawn blocks from the Traditional Quilts, one of Cochenille's Elements Clip Art collection. In the following lesson we will us Stitch Painter, and two files from Quilt collection; PINWASK2 and NTHMBLS2.


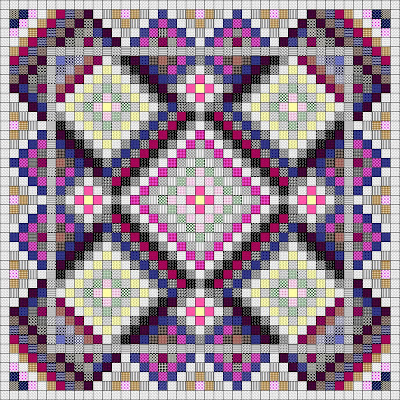
Creative Play 1 - Using different block sizes to create your quilt.
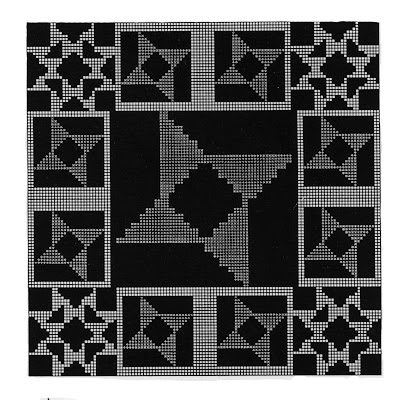
The quilt above was designed with the brushes named PINWASK2 and NTHMBLS2. These are 4-patch brushes in 2 colors. To start your quilt in Stitch Painter you will need to determine the size of the finished piece. In your mind, you will determine the scale of each grid square. For example, you may decide each grid square in Stitch Painter will represent a square inch or half a square inch. We will use 1/4 square in. The size of the grid doesn't really matter, as long as it is square. Therefore, lets set it at 8 pixels wide, and 8 pixels tall (Layout/Grid menu).

Your document size would be equal to the finished size of your piece multiplied by the gauge/count (if knitting or stitching) or the inch scale (if quilting) of the materials you are working with. Lets say your quilt will be 3 ft x 3 ft and we want each square (grid) to be 1/4 inch. Multiply 36 inches X 4 Squares to the inch to get 144. Our document size will thus be 144 units wide, and 144 units tall (File/Set Document Size). As it turns out, our clip art blocks measure 24 units wide and 24 units tall. If each unit on the grid equals 1/4 inch, then our blocks will measure 6 inches square (divide 24 by 4).

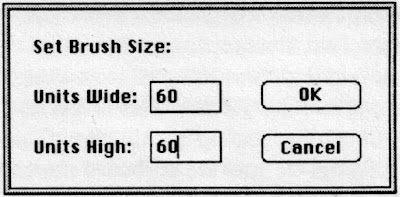
After you have set your document size you may then start loading brushes, experimenting with different colors and sizes, and begin stamping the blocks in place. I enlarged NTHMBLS2 to a brush size of 30x30 and began to stamp it in place. When you are loading brushes, you may change the size by using the Set Size selection under the BRUSH menu. I also enlarged PINWASK2 to a 60x60 brush because I wanted the center design larger than the borders.


At this point you could manipulate your quilt brushes as you set them in place, using your keyboard shortcuts; x to flip horizontally, y to flip vertically and z to rotate a quarter turn. You could even capture a particularly interesting area of the quilt as a brush and use that for your border.

One of the best features of Stitch Painter is the ability to change colors and motif sizes in a snap. After bringing in both brushes and stamping them in place, I wanted to change the colors. This time I chose the simple approach, and selected the Fill Bucket and a color from within one of the blocks (using the eye dropper) to fill in the white background spaces of the quilt.

Creative Play #2, Repeat Functions
Another Stitch Painter functions that is wonderful for design and visualization is the ability to create repeat patterns. With the quilt blocks in the Elements Collection there are two sizes to work with; 24x24 for the 4-patch quilts and 36x36 for the 9 patch quilts. Let's build a repeat with a 4 patch block:

1. Set the grid size to 4 pixels wide by 4 pixels tall (Layout/Grid), as this will create a smaller squre grid, and you will see more of the quilt at once on the screen. Again, we will assume that each square represents a 1/4 inch.

2. Load your 24x24 quilt block as a brush (Brush/Load menu). Use either SAILBOAT.SBR or EVESTAR.SBR on the disk.

3. Set your Document Size to 120 units wide by 120 units tall (File/Set Document Size.)

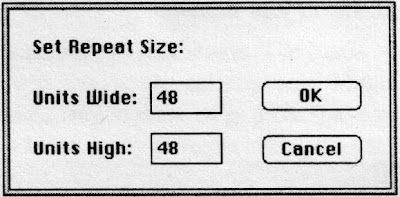
4. Under the Layout menu choose Set Repeat Size. We'll use 48 as the width and height. (a multiple of 24)


5. When you stamp your motif on the screen, it will repeat every other block in the width and height. You may want to stamp the first brush in the upper left corner of the screen in order to ensure that the blocks all fit perfectly on the document.


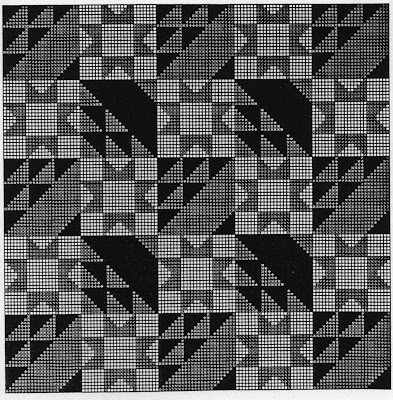
In the illustration above I loaded SAILBOAT.SBR (9 patch) from the Elements Collection and I used that block repeat. Since this block was a 36x36 unit brush, I chose Brush/Set Size and changed the block size to 24x24. You can also flip and rotate the brush by using x, y or z on your keyboard. After stamping the sailboat block in alternate checkerboard manner, I loaded a second block/brush, EVESTAR.SBR (4 patch) and played with it. If I had wanted to, I could have simply created a solid colored block by using the solid rectangle tool.

I decided to create a positive/negative color effect with the EVESTAR brush. To alternate the colors in the blocks, use the fill bucket. I temporarily changed the dark blue of one block to pink (with Repeat still turned on). Then using the fill bucket you can exchange the light blue with the dark blue then exchange the pink with the light blue. You have now the same blues but reversed in the alternate EVESTAR blocks.

Stitch Painter allows you to exchange colors easily and quickly once the quilt is designed. To do this, open the Color Mixing palette/window (Windows/Color palette on the IBM, or tear it off on the Mac). Then, using your eye dropper, select a color in the quilt you want to change. Once this is the selected color in the Working Palette (on the left), choose the new color you would like to try in the Mixing Palette. The new color will move into the old colors place. You can continue to experiment with various color ways until you create the quilt of your dreams.


Stitch Painter also lets you swap colors for symbols and Textures (Gold version only) at any time. When your design is finished you can also estimate your yardage, yarns or floss usage by clicking the eyedropper tool in the Tool palette and your number of stitches will show up at the lower left corner (coordinate bar). Depending on the scale you have determined, you can then estimate yardage usage by how many units you have of that color. In addition, if you plan to knit or stitch the garment, this process will tell you how many stitches of that color.

~Tracy~

Saturday, May 22, 2010

Knit Handbag with Bamboo Handles

I started to teach myself how to knit in 2007. I quickly realized that it was a craft that had to be practiced, in order to be good at it.

So like all beginners I started knitting scarfs, but guess what there is no need for them in the desert. Plus I don't have many friends that live in cold weather climates that I can give them away to.

I started knitting rectangles out of a single ball of yarn. That way all I needed to do was put the needles and one ball of yarn along with my Handy Dandy Stitch 'n' Bitch book in a small bag. That book was the only one out of the dozen or so 'teach yourself to knit' books I had bought that I actually understood. When I go back to those books I now understand what they are talking about, but that wasn't the case when I first picked them up. Debbie Stoller's Story telling while teaching you how to knit is what worked for me. It just clicked better.

So as you can imagine I started to acquire quite a bit of rectangles of varying sizes. I decide to try and figure out what I should do with them. I then saw a cute knit bag on Bamboo Handles and quickly figured out how to turn my rectangles into simple purses.

I gave away a few last Christmas as gifts, but I still do a lot of waiting at Dr. Appointments and such. That's when I decided to knit with a purpose a 6 inch Bamboo handle needs a 12 inch by 16 inch rectangle in order to make a good size small bag.


Right now I have one listed on Etsy:


I have one that is ready to be put together:

And one that I just casted on from one of my early failed attempts of winding a ball:


I've come to the conclusion that I like knitting rectangles in Garter stitch - It's relaxing and they make great purses!

Tuesday, May 11, 2010

Scrabble Tile Fever

I love having all my stuff out on tables. The different tables are no longer in one room, But everything is out! I've been sewing since I moved here - taught a few sewing classes. I pulled out all my scrapbooking stuff and made a nice but very late Birthday card!

And yesterday I made Scrabble Tile Pendents (well mine aren't made with scrabble tiles but same concept). So now I've used the beading table


- the only one left to use is the Knitting Machine table - that one's next I've got a skirt project planned!!!

I have been watching the Scrabble Tile Pendent craze get really crazy there are tons of people selling there own versions of them on the internet. I almost bought a few but didn't because I have that 'I can make that' disease - we all know it. You look at something you really like and you don't buy it because you 'know you can make it'.

Well I finally got around to making it. I gave myself a little push by purchasing a tutorial from Littleputbooks on etsy. I tend to do that when I really want to get something done. I'll buy a part of or a piece of the item that I want to make and that allows me to put that item on the top of my 'to do' pile. And know that I have 5 desks with 5 different purposes I'm finding that I'm doing things that I hadn't made time to do in the past. The process of making things also goes a lot faster, with everything out in the open and in one general area!!!

I'm really glad I now have the room to organize myself in such a manner!


Here are my first couple of Pendants:


Not to bad for my first try!!! The Egyptian one was the first one - It doesn't have enough Diamond Glaze I was scared it was going to run off the side of the wood tile. The 2nd one came out perfect!

Tuesday, May 4, 2010

Using Brushes with Stitch Painter

Using Brushes with Stitch Painter by Betty Abbott, Christchurch, New Zealand

**Note: Although this article addresses machine knitting examples, one can learn and adapt the concept to their own craft.

Stitch Painter brushes offer so many opportunities for short cuts in design that it is worthwhile creating 1TOOLS FILE to keep them all handy and in one place. Of course, you can save each brush individually, to be called up when needed, or you can toggle to the 1TOOLS file to select, capture and make a brush when you need it. Why not call your master file simply Tools? Because it takes time to run through all the alphabetically listed files until T appears. Put a 1 in front and it jumps the queue and appears on the opening list... And of course when 1Tools gets to large, 1aTools will be added.

So what brushes are saved to a 1Tools file?
Mine are geared towards knitting pattern design. Using lots of single bed jacquard (fairisle) it is preferable to keep floats to a maximum length of 7 stitches.


So first up is a float check: a horizontal line of 7 stitches in a bright, easily seen colour. Load this and run it over any new fairisle design to check the float length. If it doesn't span the space between any two stitches in the pattern the float will be too long and the pattern needs editing.


Alternate row alternate needle selection is a frequently used but tedious to draw pattern. Keep a block of it on hand as a saved brush - and use a brush of a single row of alternate dots to create it. When you want a diamond filler, load the brush, stamp and trim it to shape, load the adjusted shape and enjoy the time you've saved.


2 x 2 selection? Load the 1 x 1 brush, BRUSH MENU set size and double the width and height. FILE MENU, save as: 2x2check.


A one stitch one row diagonal? Hold down Control as you draw with the line tool, save as a 1stdiag brush.


Or a one stitch two row diagonal? load the 1stdiag brush. BRUSH MENU set size: double the height and leave the width unaltered, FILE MENU, save as a new brush.


Trellis? - diamond or block - useful in several sizes. Above: Examples above and below show a double stamping of the brush alongside. - a fun way to create new borders or allover patterns.


Above: If you are going to be using several related 'tools' in a pattern, save them all as one brush, load, positioning at one side of the page well out of the way of the developing pattern and recapture each individual tool as it is needed.

Gridding lace patterns can be very tedious business with lots of scope for errors. But if you analyze the sequences most frequently used, brushes can improve accuracy and speed up the design process at the same time. You may want to open a separate Lace Tools file for quick access to them.

Suggested sequences are:

Multi diagonal transfer sequences separated by 2 rows stocking stitch.

Diagonal single transfers separated by 2 rows stocking stitch.

Vertical single transfers separated by 2 rows stocking stitch.

Brushes about 4 transfers high/wide are a useful size. A large pattern will build up quickly and accurately by overlapping the last stitch with each stamp, with the minimum of erasing when the pattern is small. Neither is there any need to be concerned about direction with diagonal transfers. A horizontal flip (x) will slope it the opposite way.

Perhaps a GCARTOOL file as well? Moss stitch and double moss, basket stitch, ribs, broken ribs, double garter stitch, diamonds made up of one stitch two row diagonals and so on. The same for Tuck and Slip.

Not directly pattern related but nevertheless very useful is a numbers brush. Although there is already a set of numerals in the SYMBOLS palette (WINDOWS MENU, Symbols) for my purposes I found these a little on the small side so created a set of my own which were loaded into the working palette, lined up on the page, and saved as a NUMBERS brush. Now whenever I need to add numbers to a pattern which is to be printed I load the Numbers brush. But to access the numbers I must also go to the PALETTE MENU, and click (tick) 'Use Brush Palette'.

This loads the palette in use when the brush was saved i.e. the palette which contained the set of numerals. Remember that all the other brushes mentioned here relate to stitch pattern composition; this one does not, so DO NOT include numerals in a pattern which is to be downloaded to your knitting machine. Remember also, that numbers are symbols and may require a larger grid size in order to be seen properly. Ideally, a grid size of 8 x 8 or greater is recommended, depending upon your symbol..

Any frequently used sequence can be ready to use or adapt at any time. This holds true for HANDKNITTING AND CROCHET where certain operations, such as cables are repetitive and used in various projects.


Making a brush of various operations is an worthwhile timesaver.

Now for some 'pattern building' shortcuts you may not have used.

Want to draw with a thicker pencil? Create a brush to the pencil shape you want and click and drag to draw. The shape does not need to be squared off - experiment with rounded corners and see the nice curves they draw.

Rows of horizontal lines? in a vertical line draw one stitch for each row required. Select and create brush (s and Ctrl B or Command B). Hold down the Shift Key as you click and drag slowly across the page.

Rows of vertical lines? Draw a horizontal line with one stitch for each row required (or rotate (z) the horizontal line brush, mentioned above). Create brush, Shift Key, click and drag slowly.


The more I use Stitch Painter the more exciting become the possibilities of this wonderful design tool - and I'm sure these ideas have barely scratched the surface of the innovative ways in which Brushes can be used.

~Betty~

Click Here for some Stitch Painter files. Do so will download a zipped folder called betty that has some Stitch Painter files and some Stitch Painter brush files.

LinkWithin

Related Posts with Thumbnails