By Tracy Ahrens, Cardiff by the Sea, CA
Many of us have grown up with the quilts that have been handed down through generations and quilting today is one of the most popular fiber-art crafts that exists. From the home consumer to the Smithsonian, quilt designs provides an innovative canvas you can use to convey your art.
There are endless options available now for the computer and choices that can be used for exciting new concepts in quilting. Any texture/print or color combination can now be tested and determined on the screen. In addition, you may experiment with block rotation and manipulation quickly and effectively. The end product does not necessarilly have to be a fabric quilt. Rather, you can incorporate a 'quilt-look' into a stitched piece of canvas or a knit garment. The idea is that quilt blocks serve as your inspiration.
Using Stitch Painter you can create your own quilt blocks, or as we did in the following tutorial, you may use pre-drawn blocks from the Traditional Quilts, one of Cochenille's Elements Clip Art collection. In the following lesson we will us Stitch Painter, and two files from Quilt collection; PINWASK2 and NTHMBLS2.
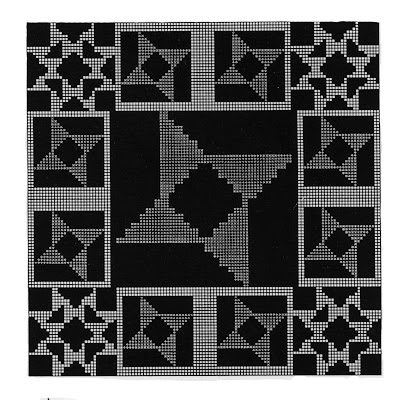
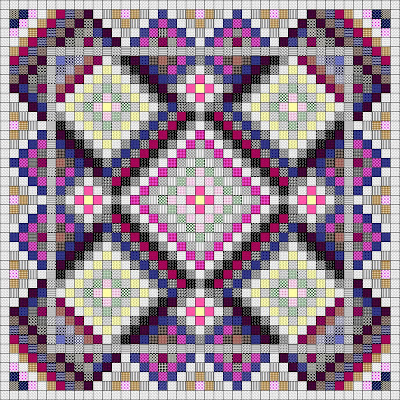
Creative Play 1 - Using different block sizes to create your quilt.
The quilt above was designed with the brushes named PINWASK2 and NTHMBLS2. These are 4-patch brushes in 2 colors. To start your quilt in Stitch Painter you will need to determine the size of the finished piece. In your mind, you will determine the scale of each grid square. For example, you may decide each grid square in Stitch Painter will represent a square inch or half a square inch. We will use 1/4 square in. The size of the grid doesn't really matter, as long as it is square. Therefore, lets set it at 8 pixels wide, and 8 pixels tall (Layout/Grid menu).
Your document size would be equal to the finished size of your piece multiplied by the gauge/count (if knitting or stitching) or the inch scale (if quilting) of the materials you are working with. Lets say your quilt will be 3 ft x 3 ft and we want each square (grid) to be 1/4 inch. Multiply 36 inches X 4 Squares to the inch to get 144. Our document size will thus be 144 units wide, and 144 units tall (File/Set Document Size). As it turns out, our clip art blocks measure 24 units wide and 24 units tall. If each unit on the grid equals 1/4 inch, then our blocks will measure 6 inches square (divide 24 by 4).
After you have set your document size you may then start loading brushes, experimenting with different colors and sizes, and begin stamping the blocks in place. I enlarged NTHMBLS2 to a brush size of 30x30 and began to stamp it in place. When you are loading brushes, you may change the size by using the Set Size selection under the BRUSH menu. I also enlarged PINWASK2 to a 60x60 brush because I wanted the center design larger than the borders.
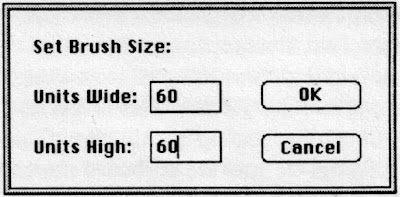
At this point you could manipulate your quilt brushes as you set them in place, using your keyboard shortcuts; x to flip horizontally, y to flip vertically and z to rotate a quarter turn. You could even capture a particularly interesting area of the quilt as a brush and use that for your border.
One of the best features of Stitch Painter is the ability to change colors and motif sizes in a snap. After bringing in both brushes and stamping them in place, I wanted to change the colors. This time I chose the simple approach, and selected the Fill Bucket and a color from within one of the blocks (using the eye dropper) to fill in the white background spaces of the quilt.
Creative Play #2, Repeat Functions
Another Stitch Painter functions that is wonderful for design and visualization is the ability to create repeat patterns. With the quilt blocks in the Elements Collection there are two sizes to work with; 24x24 for the 4-patch quilts and 36x36 for the 9 patch quilts. Let's build a repeat with a 4 patch block:
1. Set the grid size to 4 pixels wide by 4 pixels tall (Layout/Grid), as this will create a smaller squre grid, and you will see more of the quilt at once on the screen. Again, we will assume that each square represents a 1/4 inch.
2. Load your 24x24 quilt block as a brush (Brush/Load menu). Use either SAILBOAT.SBR or EVESTAR.SBR on the disk.
3. Set your Document Size to 120 units wide by 120 units tall (File/Set Document Size.)
4. Under the Layout menu choose Set Repeat Size. We'll use 48 as the width and height. (a multiple of 24)
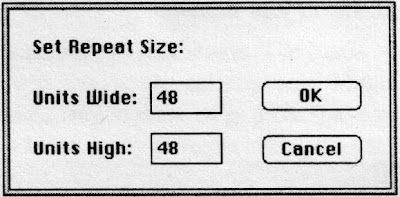
5. When you stamp your motif on the screen, it will repeat every other block in the width and height. You may want to stamp the first brush in the upper left corner of the screen in order to ensure that the blocks all fit perfectly on the document.
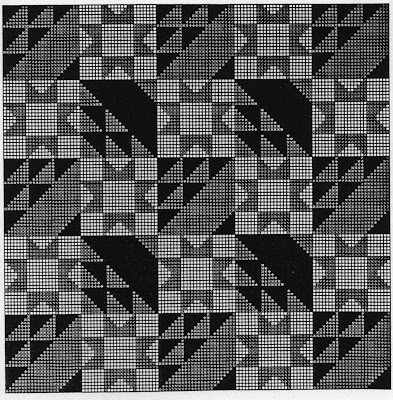
In the illustration above I loaded SAILBOAT.SBR (9 patch) from the Elements Collection and I used that block repeat. Since this block was a 36x36 unit brush, I chose Brush/Set Size and changed the block size to 24x24. You can also flip and rotate the brush by using x, y or z on your keyboard. After stamping the sailboat block in alternate checkerboard manner, I loaded a second block/brush, EVESTAR.SBR (4 patch) and played with it. If I had wanted to, I could have simply created a solid colored block by using the solid rectangle tool.
I decided to create a positive/negative color effect with the EVESTAR brush. To alternate the colors in the blocks, use the fill bucket. I temporarily changed the dark blue of one block to pink (with Repeat still turned on). Then using the fill bucket you can exchange the light blue with the dark blue then exchange the pink with the light blue. You have now the same blues but reversed in the alternate EVESTAR blocks.
Stitch Painter allows you to exchange colors easily and quickly once the quilt is designed. To do this, open the Color Mixing palette/window (Windows/Color palette on the IBM, or tear it off on the Mac). Then, using your eye dropper, select a color in the quilt you want to change. Once this is the selected color in the Working Palette (on the left), choose the new color you would like to try in the Mixing Palette. The new color will move into the old colors place. You can continue to experiment with various color ways until you create the quilt of your dreams.
Stitch Painter also lets you swap colors for symbols and Textures (Gold version only) at any time. When your design is finished you can also estimate your yardage, yarns or floss usage by clicking the eyedropper tool in the Tool palette and your number of stitches will show up at the lower left corner (coordinate bar). Depending on the scale you have determined, you can then estimate yardage usage by how many units you have of that color. In addition, if you plan to knit or stitch the garment, this process will tell you how many stitches of that color.
~Tracy~

No comments:
Post a Comment